Monthly Archives: August 2015

Mexican Inspired Corn and Bean Dip- easy and delicious

The inspiration for my warm, kidney bean and corn dip is corn on the cob in Mexico. In Mexico, you’ll see vendors hawking grilled corn on the cob rubbed with mayonnaise and chili powder and a dash of Parmesan. The Parmesan doesn’t seem like it would pair well, but it does.  That slight tang beefs up the flavor in the beans and complements the corn.

In this dip, I add corn, dark kidney beans (you can also substitute pinto), mayonnaise, green chilies, chili powder, cumin, lime, Parmesan and cilantro and warm it on the stovetop for about 3 minutes. Before serving, I add a handful of shredded cheddar. Serve it with tortilla chips. It’s best warm, but is still delicious when it cools.

I’ve served it twice and it’s been a huge hit!

beandip

Mexican Inspired Corn and Bean Dip

1 (15-ounce) can of whole kernel corn

1 (15-ounce) can dark kidney beans or pinto beans

1 cup chopped red onion

1 teaspoon canola oil

½ teaspoon cumin seed

1 (4-ounce) can of chopped green chilies

½ cup mayonnaise

¼ cup shredded Parmesan cheese

1 teaspoon chili powder

1 tablespoon lime juice

2 tablespoons chopped cilantro

1/3 cup shredded cheddar cheese

Chop onion and set aside. Drain the beans and corn and set both of those aside.

In a medium skillet, heat the oil over medium heat. When hot, add onion and cumin seed and cook 4 minutes. Then pour in the rest of the ingredients and stir. Reduce heat to medium-low and cook 3 more minutes until everything has melted together and is well combined. Serve with tortilla chips.

beandip chip

Basil Hummus

I love just about every type of hummus. When I was 9, I never thought I’d eat it again. My family lived in Sudan for about 8 months and the first two months we lived in a hotel. The hotel had the most limited menu so we eat hummus twice a day. I hated it by the end of that stay. I swore off hummus. It was so strong, too, incredibly heavy on the tahini.

Well, I started eating it again in college and now I can’t get enough. Right now, I literally have homemade basil hummus, olive tapenade hummus, black bean hummus and a regular hummus in the fridge. I am not kidding. My husband eats it like crazy.

Anyway, I came up with this hummus earlier this summer.

This homemade hummus is always popular when I take it to a party. I don’t add fresh garlic to this hummus because I want the basil to shine. If you really love garlic, add one chopped, small clove.

I serve it with warmed garlic Naan, instead of pita bread to add a kick of garlic (but pita works fine, too). It takes minutes to whip this up in the food processor and it keeps for several days, so you can make it ahead of time (which is great when entertaining).

It’s even better the next day. Look how quick and easy this recipe is.

Basil Hummus

1 (15-ounce) can chickpeas

3 tablespoons extra virgin olive oil

2 tablespoons fresh lemon juice

2 tablespoons tahini

¾ teaspoon ground cumin (or more to taste)

1 ½ teaspoons basil paste (in a tube in the produce section)

½ teaspoon garlic salt

Place all ingredients in a food processor and process until smooth. Serve with warm pita or garlic Naan, and sliced vegetables.

Green Tomato Relish

I love relishes but so many take a long time to cook and/or are canned at the end.

My Green Tomato Relish takes less than 20 minutes and is great on pork, chicken, turkey or even brats (instead of sweet relish). It’s a sweet relish accented with coriander seed and is stored in the refrigerator for a week. If you like chutneys and relishes, give it a try.

tomato relish close

Green Tomato Relish

2/3 cup chopped red onion

2 cup green tomatoes that have been put through the food processor but are still in chunks

1/3 cup sugar

1 tablespoon coriander seed

3 tablespoons water

1/8 teaspoon celery seed

½ a small garlic clove, minced

1 tablespoon red wine vinegar

Salt and pepper to taste

In a heavy bottom medium saucepan, heat red onion, tomatoes, sugar, coriander seed, water, celery seed and garlic and bring to a boil. Reduce heat to medium and cook for 10-15 minutes until most of the liquid has been evaporated. Turn off the heat and stir in the vinegar. Allow to cool before serving.

Serve over pork chop, turkey, chicken or brats or other sausages.

Leftovers can be stored in the refrigerator for a week.

Green Tomato Salsa

My  Green Tomato Salsa which uses both tomatoes and tomatillos. It’s delicious with chips and wonderful on fish tacos. It pairs well with sour cream and cream cheese, so you can use it in a layer dip or pour it over a block of cream cheese for a dip and serve with tortilla chips.

When you’re salting it, be sure to taste it with a chip because that will add salt and you may over salt the salsa if you just taste it plain

Green Tomato Salsa

2 cups green tomatoes (cut into quarters)

6 tomatillos

Garlic salt

½ cup chopped red onion

1/3 to ½ bunch of cilantro

1 teaspoon lime juice

½ teaspoon cumin seed

1 jalapeno (or more to taste)

Preheat oven to 425

Place sliced green tomatoes and tomatillos on a baking sheet. Sprinkle lightly with garlic salt and bake for 20 minutes. Remove from the oven and allow to cool.

In the meantime, chop red onion, cilantro and deseed and chop your jalapeno. I am a wimp when it comes to spice, so I only use 1 jalapeno, but you can use several.

Add onion and jalapeno to a large bowl.

Place tomatoes and tomatillos in a food processor and chop. Then add the chopped cilantro to the tomatoes and process (you may have to do this in two batches). Pour into the bowl.  Add lime juice and cumin seed and stir. Add garlic salt to taste. The salsa is after 2 hours and even better the next day.

Options: If you want more contrast in flavor, only cook 1 cup of tomatoes and use 1 cup of fresh, finely chopped green tomatoes. It makes it slightly more bitter, but I adore the flavor and texture and it tastes really fresh.

If you want to add some sweetness, add ½ of cooked corn (about 1 ear of fresh corn or you can use canned).

Unfried Green Tomatoes with Horseradish VS Fried Green Tomatoes

I love fried green tomatoes. I only allow myself to eat one every couple years because it seems so wrong. But this summer, I came up with an unfried version that I actually like better than the fried. I am pretty much in LOVE with these unfried tomatoes.

Why?

First, I coat the tomato in horseradish sauce. Talk about delicious. Then, I encrust the tomato in Panko and French Fried Onions and bake at 450. Talk about delicious. You have to eat them right away to prevent them from getting soggy.

unfried tomato

Unfried Green Tomatoes with Horseradish

2 medium green tomatoes

1/3 cup Woeber’s horseradish sauce (or your favorite)

3 tablespoons light mayonnaise

Salt and pepper

½ cup regular panko breadcrumbs

¾ cup French Fried Onions

Cooking spray

Preheat oven to 450. Place a metal baking dish, covered in aluminum foil, in the oven when you turn it on.

Slice tomatoes, pat dry, and salt and pepper each piece. Set aside.

Stir together horseradish sauce and mayonnaise and set aside.

On a plate, combine breadcrumbs and onions and toss with your hands. Your fingers will get dirty making this dish, so keep a towel handy.

Dip tomatoes in mayonnaise mixture being sure to coat the tomato as much as possible. Then dip it into the panko breadcrumbs and onions and press the mixture into the tomato. You want it coated as well as possible. Do this with each tomato slice.

When oven is preheated, carefully remove the hot pan with oven mitts and spray the foil with cooking spray. Place the tomatoes on the pan and spray the tops of the tomatoes.

Bake for 12 minutes and serve warm. Note: I don’t flip them in the cooking process because too much coating is lost. You will have a soft tomato and crunchy tops.

Now, there’s no comparison in terms of the photography. Fried green tomatoes look a lot better on camera. But in the mouth, I’ll take the unfried.

fried green tomat

Panko Encrusted Fried Green Tomatoes with Dill Sauce

2 large green tomatoes

Salt

½ cup flour

1 teaspoon garlic salt

½ teaspoon pepper

3 large eggs

3 tablespoons half and half

1 ½ cups Italian panko breadcrumbs

1/2 cup sour cream

1 teaspoon dried dill weed

Canola or vegetable oil for frying

For the sauce: stir together sour cream and dill. Cover and refrigerate until time to serve.

For this recipe, you want to work close to the stove. Get your station set up before you heat the oil.

Slice tomatoes into 1/3 to ½ inch slices.  Sprinkle with salt and set aside.

On a medium plate, stir together flour, garlic salt and pepper.

Whisk together eggs and half and half and set in a shallow bowl.

Pour the breadcrumbs into another bowl and set aside. You want the lineup to be tomatoes, flour, eggs, breadcrumbs.

Pour enough oil into a frying pan to cover at least ½ an inch. Turn the heat on to medium.

When the oil is hot, dip a tomato into flour, then into the egg and be sure to thoroughly coat it and then press it into the breadcrumbs. You may need to press the crumbs onto the tomato.

Gently place it in the frying pan and cook it about 1 minute per side (as the oil gets hotter, you may cut cooking time down to 45 seconds a side).

When done, drain on paper towels and serve with a dollop of sour cream.

Note: if you don’t like dill, you can use 1 -2 teaspoons of basil paste instead.

Hawaiian Chicken Salad

Let me start by saying, don’t let this unattractive photo fool you, this dish is delicious. I’d have a better photo if I wasn’t allergic to cashews and getting just this close on my iPhone triggered a big reaction!

I’ve been playing around with this concept of a Hawaiian chicken salad for quite some time and I have not been happy with the results … until now.

I initially made this with macadamia nuts, but they didn’t offer enough crunch. So I decided on cashews, the one problem is I am allergic to cashews. It’s the only food I am allergic to.

No worries, I thought, I will be sure not to touch the nut and I’ll be fine. Wrong. As I stirred this salad (I was taking it to a ladies gathering that night), I started to run bright red! I got hives down my neck and throat and started to consider a trip to urgent care. Luckily, it only last about 30 minutes.

But now I know not only am I allergic to cashews, I am highly allergic, so this will be the last recipe I likely post with the nut. And that is why these pictures are so pitiful. I shot it quickly on my iPhone instead of taking time with my big camera.

I just needed to get away from this nut.

So, try it out. The ladies loved it! I tasted it before I added the nut and liked it, but I knew the cashew would add a lot of depth to this dish.

The combination of basil, pineapple, chicken and cashews explodes with flavor. It’s fantastic! I really wish I could have done some food styling.

I hope you like it.

Hawaiian Chicken Salad

1 rotisserie chicken

½ cup chopped red onion

1 cup minced fresh pineapple

1/3 cup chopped celery

12-15 basil leaves

¾ cup cashews

2/3 cup mayonnaise

1 teaspoon red wine vinegar

Salt and pepper to taste

Remove all the skin from the rotisserie chicken and  discard. Then pull the meat off the bones and chop the entire chicken into pieces. Place it in a large container with a lid.

Chop onion, pineapple, celery and thinly slice basil leaves. Add to the bowl. Top with cashews.

Stir together mayonnaise and red wine vinegar. Add to the dish and stir to coat. Add salt and pepper to taste. For best results, cover and refrigerate 2 hours before serving.

You can eat this salad as a sandwich or wrap, with cracker or tortilla chips (I served tortilla chips and it was popular) or on a bed of lettuce as a real salad.

Mango, Pineapple Salsa (serve it as an appetizer first and leftovers on pork, chicken or fish)

I love salsa. Fruit salsa. Smokey salsa. Charred salsa. Jarred salsa. Green salsa. You name it, I love it.

But I particularly love this Mango, Pineapple Salsa. One of my best friends makes a similar salsa and this is my version. My salsa won “Best Overall Salsa” at a friendly competition and it was up against an array of excellent salsas.

Aside from being delicious served on its own, this salsa is great on grilled fish or pork. I recently marinated pork chops for 24 hours in Soy Vay Veri Veri Teriyaki sauce (online) http://www.soyvay.com/flavors/veri-veri-teriyaki) and then pan fried the pork and topped it with the leftover salsa. It was fantastic!

 Pork with Mango, Pineapple Salsa

If you don’t have that sauce, use soy sauce, ginger, 1 teaspoon canola oil, 1 teaspoon rice wine vinegar  and 1/2 a garlic clove for 3-4 pork chops. That makes a nice marinade. A pork loin marinated in Asian sauce, grilled and then served with this salsa would be spectacular.

This would also be great on chicken or fish tacos.

The key to this salsa is ripe, sweet fruit. Mangoes are hardly ever ripe when you buy them, so I buy them 3-4 days before I need to make this salsa. I also buy extras in case some are not sweet. Whenever I have to use avocados or mangoes I buy extra because you’ll often get a disappointing one in the batch. I bought 5 mangoes to be safe. There were all sweet, so I ate the others for breakfast.

Let this marinate for 2 hours or more before serving. You can adapt this recipe and add 2/3 cup drained black beans to this and it’s delicious, too. In that case, I also add 1 teaspoon fresh lime juice

If you can’t find ripe mangoes, you can use the jarred refrigerated type, but fresh is always best!

I like to serve it in a margarita or martini glass for nice presentation. It’s such a refreshing salsa for summer. I adore it!

salsa2

Mango, Pineapple Salsa

2 1/2 very ripe mangoes, chopped fine

2 ½ cups finely chopped fresh pineapple

¾ of a medium red onion, chopped

2/3 of a bunch of cilantro, chopped

1 large jalapeno, seeded and chopped fine

1 teaspoon cumin seed

¼ teaspoon ground cumin

Sea salt to taste

.Directions:

Chop all the ingredients and place in a medium bowl. Add salt to taste. Toss and refrigerate at least 2 hours before serving.

Light Greek Chicken Salad

If you love chicken salad, but are watching your fat intake, then try my Greek version. It has less calories, less than half the fat of traditional chicken salad, and calcium and probiotics. You can shave more calories by using low fat yogurt and it still tastes good.

It’s a light and healthy version.

Dill and Kalamata olives really pump up the flavor in this dish. I use garlic salt to flavor it, too. I enjoy this salad in a wrap, but you can also serve it as a salad or with pita chips as a dip.

The key is to refrigerate it at least 2 hours before serving (more is always better).

Light Greek Chicken Salad

1 rotisserie chicken

4 green onions

1 stalk celery

1 cup chopped cucumber

1/3 cup chopped Kalamata olives

1 cup plain Greek yogurt (whole or low fat)

1 teaspoon dried dill weed

1 teaspoon lemon juice

Garlic salt to taste

Pepper to taste

Remove all the skin from the rotisserie chicken and discard. Then pull the meat off the bones and chop the entire chicken into pieces. Place it in a large container with a lid.

Chop onions, celery, cucumber and Kalamata olives and add to chicken.

In another bowl, stir together Greek yogurt, dill week, lemon juice and a dose of garlic salt. Pour over chicken and stir to combine all ingredients.

Cover and refrigerate at least two hours before serving. Add garlic salt and pepper to taste before serving.

DSC_0917 (2)

Mexican Shrimp Cocktail — SO DELICIOUS

Why do I call this Mexican Shrimp Cocktail? Because it’s based on a dish I love at a local Mexican restaurant and that is exactly what they call it.

In flavor, it’s really a cross between a ceviche, salsa and shrimp cocktail. I love Ecuadorian style ceviche, which has tomato and lot of citrus. It’s served with popcorn on top, which sounds weird but is amazing. However, it’s huge pain to make. So I simplified the concept by using Zing Zang, which is one of my favorite Bloody Mary Mixes.

The I add fresh lime juice, cilantro, shrimp (cooked because I live in the Midwest and would not trust raw shrimp here), tomatoes, cucumbers and chunked avocado. This is divine. It’s excellent for a summer party because it’s light and people can serve themselves. It’s fun served in martini or margarita glasses.

Plus, if you have a garden, you can use the cucumbers and tomatoes out of it in this dish.

DSC_0448 (2)

Mexican Shrimp Cocktail

2 ½ cups Zing Zang Bloody Mary mix, chilled

2/3 cup chopped and peeled cucumber

1 cup chopped tomatoes

½ cup minced red onion

1/4 cup chopped cilantro

Half a red bell pepper, chopped

12 ounces cooked small shrimp (I bought frozen precooked shrimp in a bag and defrosted it)

¼ cup lime juice, minus 1 teaspoon

2 avocadoes, chopped

Note: If you are not serving this right away, then don’t add the avocadoes until you serve it.

If shrimp is frozen, follow the instructions on the package to defrost it. I defrosted mine in the refrigerator overnight.

The Bloody Mary mix should be chilled in advance especially if you plan to serve this immediately.

Because of the lime juice in this recipe, you want to use glass or another nonreactive bowl.

Place Bloody Mary mix in the bowl and set aside.

Peel and chop the cucumber; chop the tomato, onion, cilantro and red bell pepper and add to the bowl.  Drain the water off your shrimp and add to the mix. Stir in lime juice and mix thoroughly.

Gently fold in chopped avocado. Serve. You can serve this plain or with tortilla chips on the side.

Chicken Fattoush Flatbread

I love, love, love Fattoush, a Middle Eastern salad that explodes with flavor. I was first introduced to it at a Lebanese restaurant in Ghana. I lived in Ghana, in West Africa, for years and it has some incredible restaurants.

Fattoush is served with warm pita, usually crispy from the oven. If you have leftover pita from a party or pita that’s about to go stale, you should make Fattoush.   Fresh herbs, like parsley, mint, basil, are key to this salad. I pack a lot of parsley in mine and often use cilantro, too.  The vinaigrette is simple, lots of lemon and olive oil. If you love lemon, add the lemon zest, too.  I hit mine with a general dose of black pepper and garlic salt and load on the green onions.

My mouth is watering.

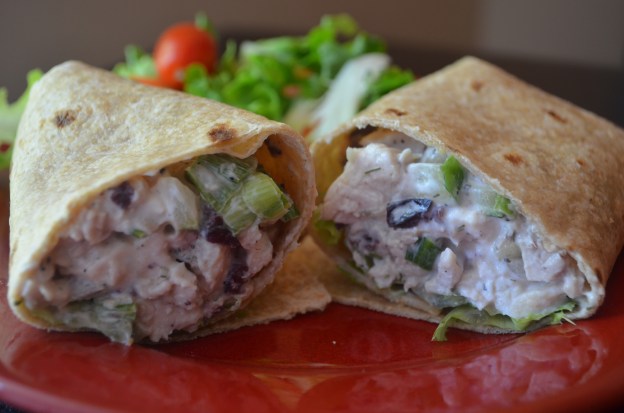
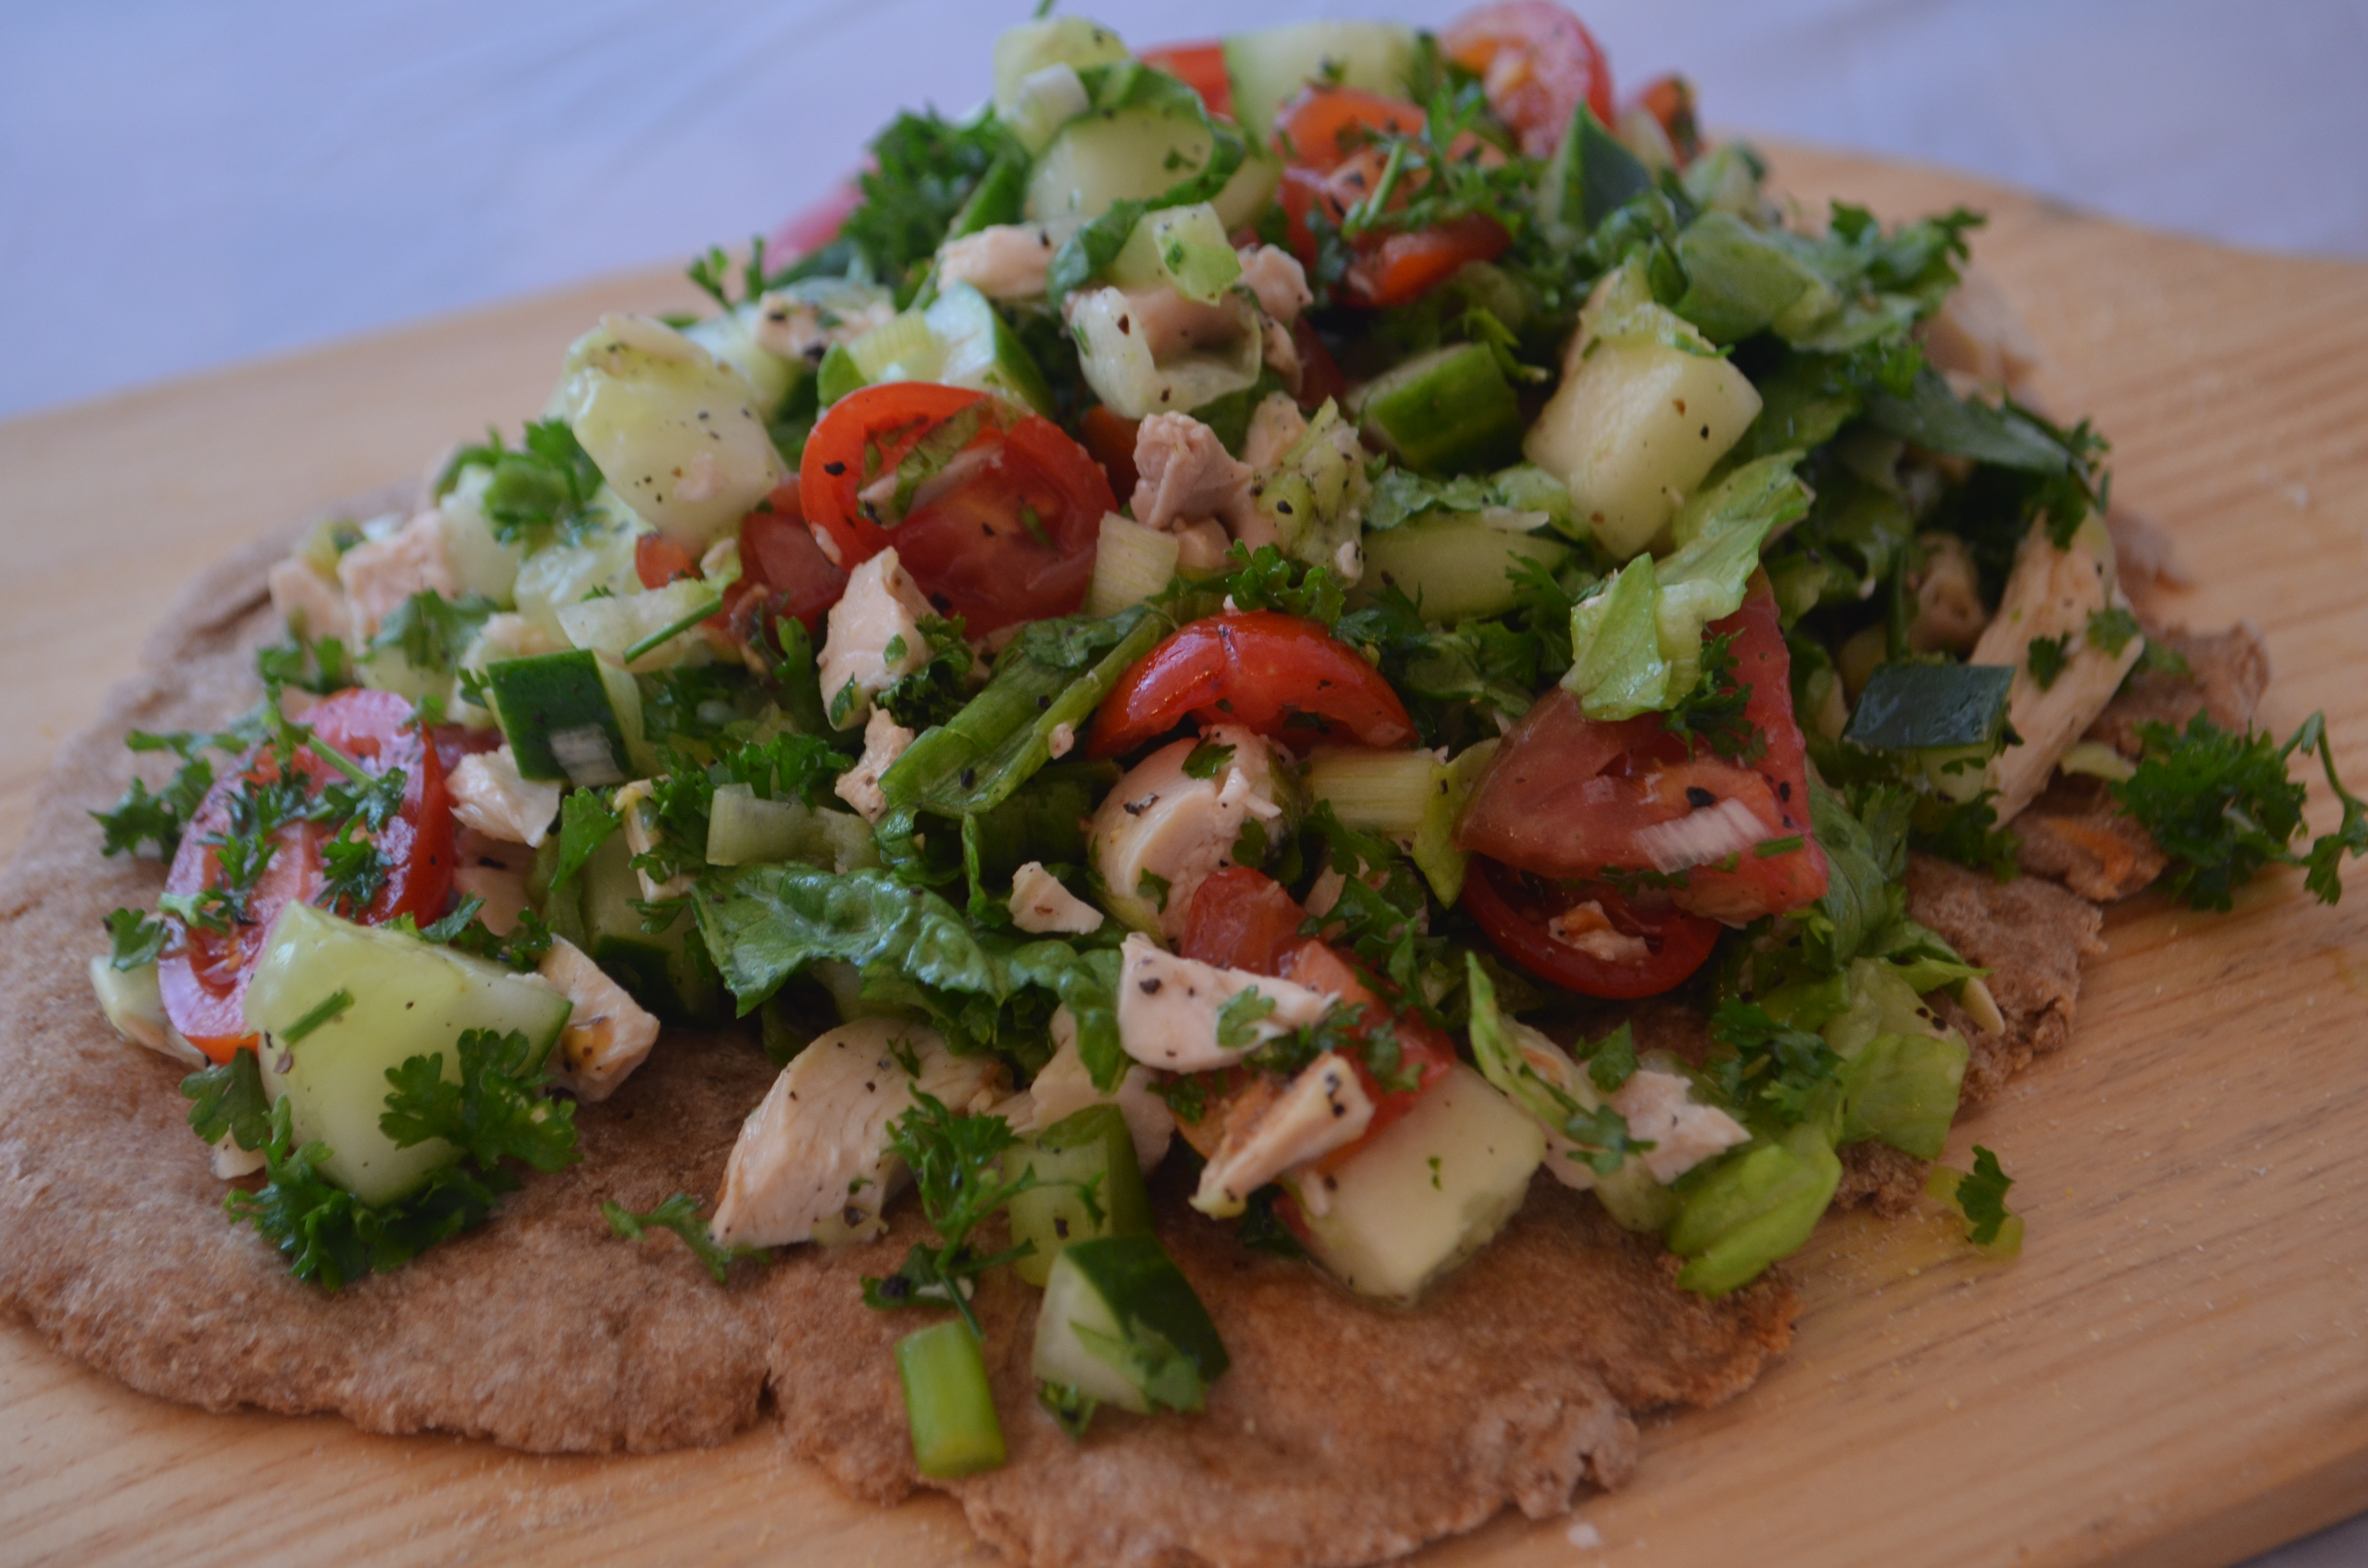
The concept of the warm pita was my inspiration for this flatbread. To transform the salad into a main course, I added rotisserie chicken and then piled it all atop of whole wheat flatbread. I made my own flatbread, but you could use Naan or pizza dough or pitas instead.

If you’re looking for a HEALTHY, delicious dinner, you’ve found it. It’s so light and flavorful. It’s the perfect summer dish.

fattoush

Chicken Fattoush Flatbread.

serves 2

1 cooked, crispy flatbread crust (I made my own whole wheat but it’s faster to buy one; my recipe follows)

1 1/2 cups thinly sliced Romaine lettuce

3 green onions, sliced

½ cup chopped flat leaf parsley

2 tablespoons chopped cilantro or mint

1 cup chopped cucumber (peeled or unpeeled, it’s up to you)

1 cup chopped rotisserie chicken

2/3 cup sliced grape tomatoes

Generous dose of garlic salt

Generous dose of black pepper to taste

Dressing

2 1/2 tablespoons fresh lemon juice

1 ½ tablespoons extra-virgin olive oil

½ teaspoon lemon zest (optional)

Salt

For the dressing, whisk ingredients together. Salt to taste and set aside.

Bake flatbread according to directions. You want the salad to rest for 5-10 minutes before you add it to the flatbread  but you also want the flatbread to be warm, so read the instructions before you make the salad so you time it right.

For the salad:

Thinly slice the lettuce and green onions and place in a large bowl.

Chop the parsley, cilantro or mint, cucumber, chicken, slice tomatoes and add to bowl. Pour salad dressing over salad and add a lot of black pepper and garlic salt. Taste as you go so you don’t oversalt. Allow it to rest 5-10 minutes.

When pita is ready, top it with the salad and serve.

You can use a pizza, pita or flabtread crust or make your own. For this portions, you will need 3-4 whole wheat pitas or

Whole Wheat Flatbread Crust

1 ½ cups whole wheat flour

2 teaspoons active yeast

1 teaspoon salt

1 cup lukewarm water

Stir ingredients together in a large bowl. Drizzle olive oil over the dough, cover the bowl with a clean towel and place on the oven to rise for 6 hours. Turn the oven on to 200 degrees or more to help it rise.

When it’s time to cook, preheat oven to 450 and place baking sheet in the oven to heat.

Split the dough in half. Coat your hands with flour and work the dough into a ball (you may need more flour). Sprinkle corn meal and flour on a flat surface. Start working the dough in your hands, pinching it to spread it out. Then place on the floured surface and spread with your fingers until you have a piece of flatbread.

When oven is ready, remove the baking sheet, sprinkle it with cornmeal to keep the dough from sticking, and bake 10-13 minutes, until crisp.

Top with fattoush and serve immediately.