Tag Archives: easy

Last Minute Halloween Ideas

The past three weeks have been insane! I’ve been working like crazy. I finally handed my first cookbook off the publisher and it should be printing soon. Aside from that, I’ve taken on a ton of food writing this month. The holidays are good for food writers, but I’ve neglected my column. So here are some last minute Halloween ideas for your party tonight.

For me, creativity is key when celebrating. I don’t want to spend a ton of money, so I immediately hit a dollar-type store before I do any other buying. Then I supplement with merchandise from bigger retailers. It’s amazing what you can find for $1 to use for a party.

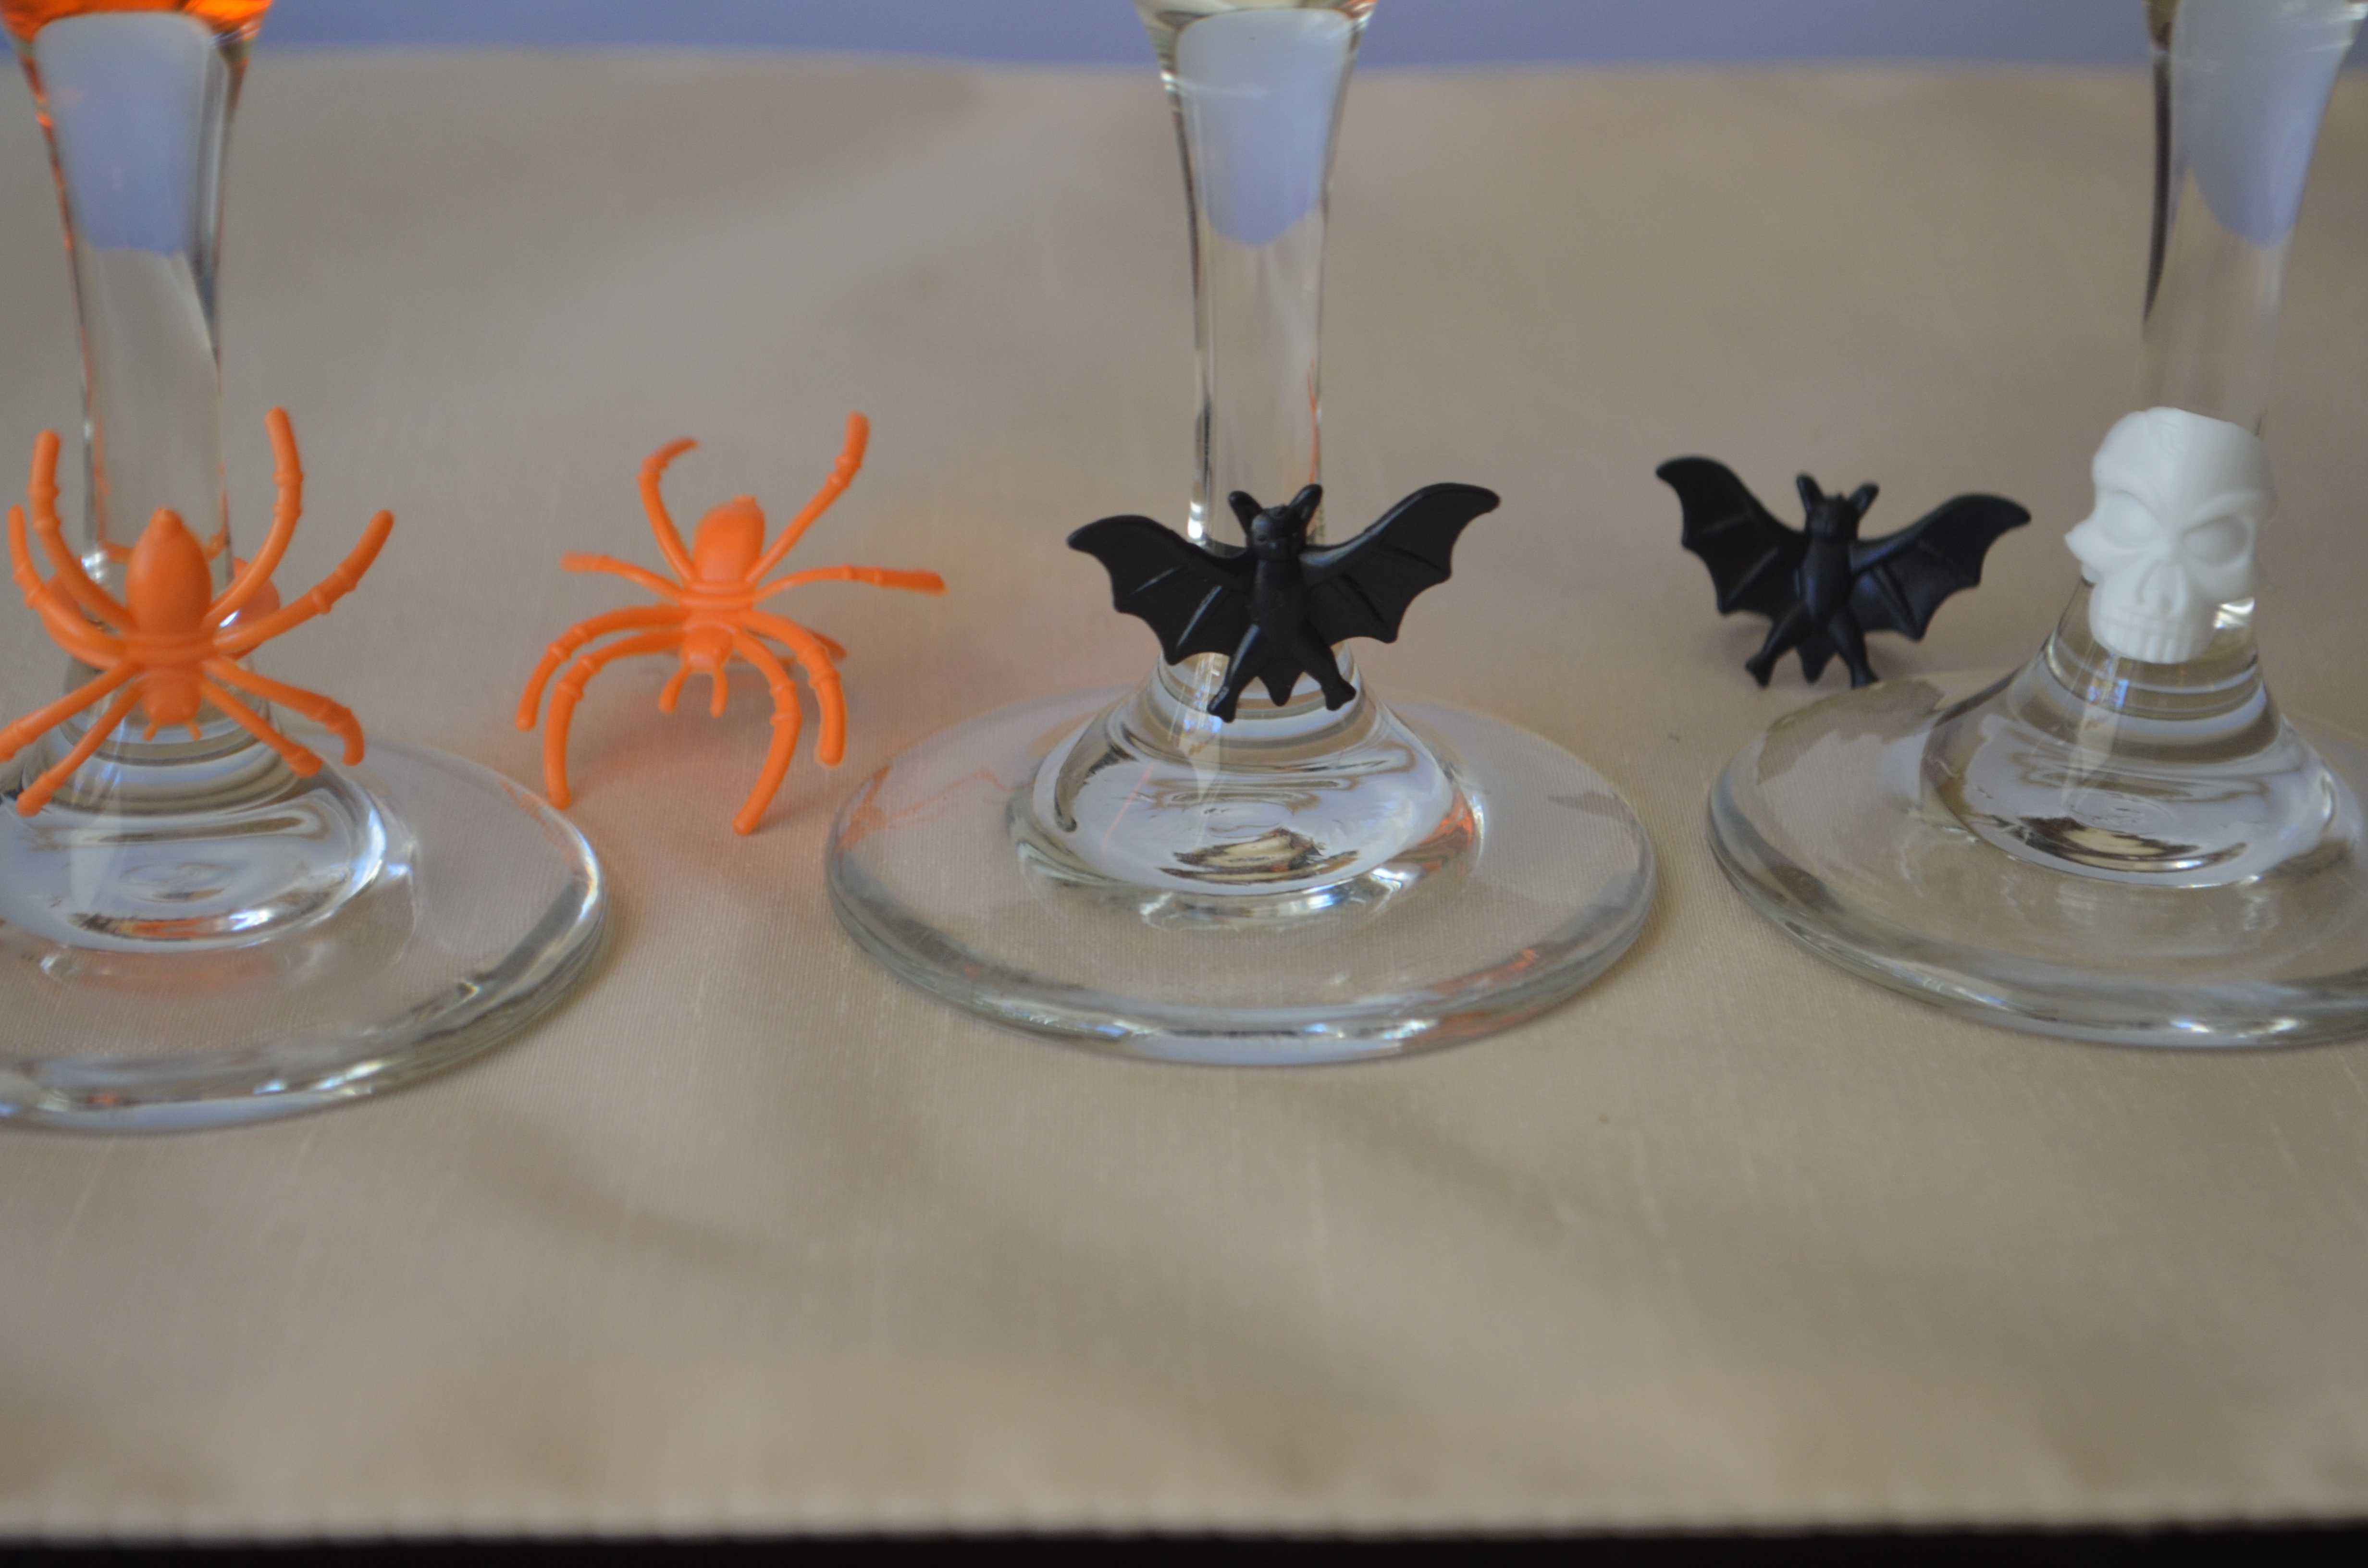
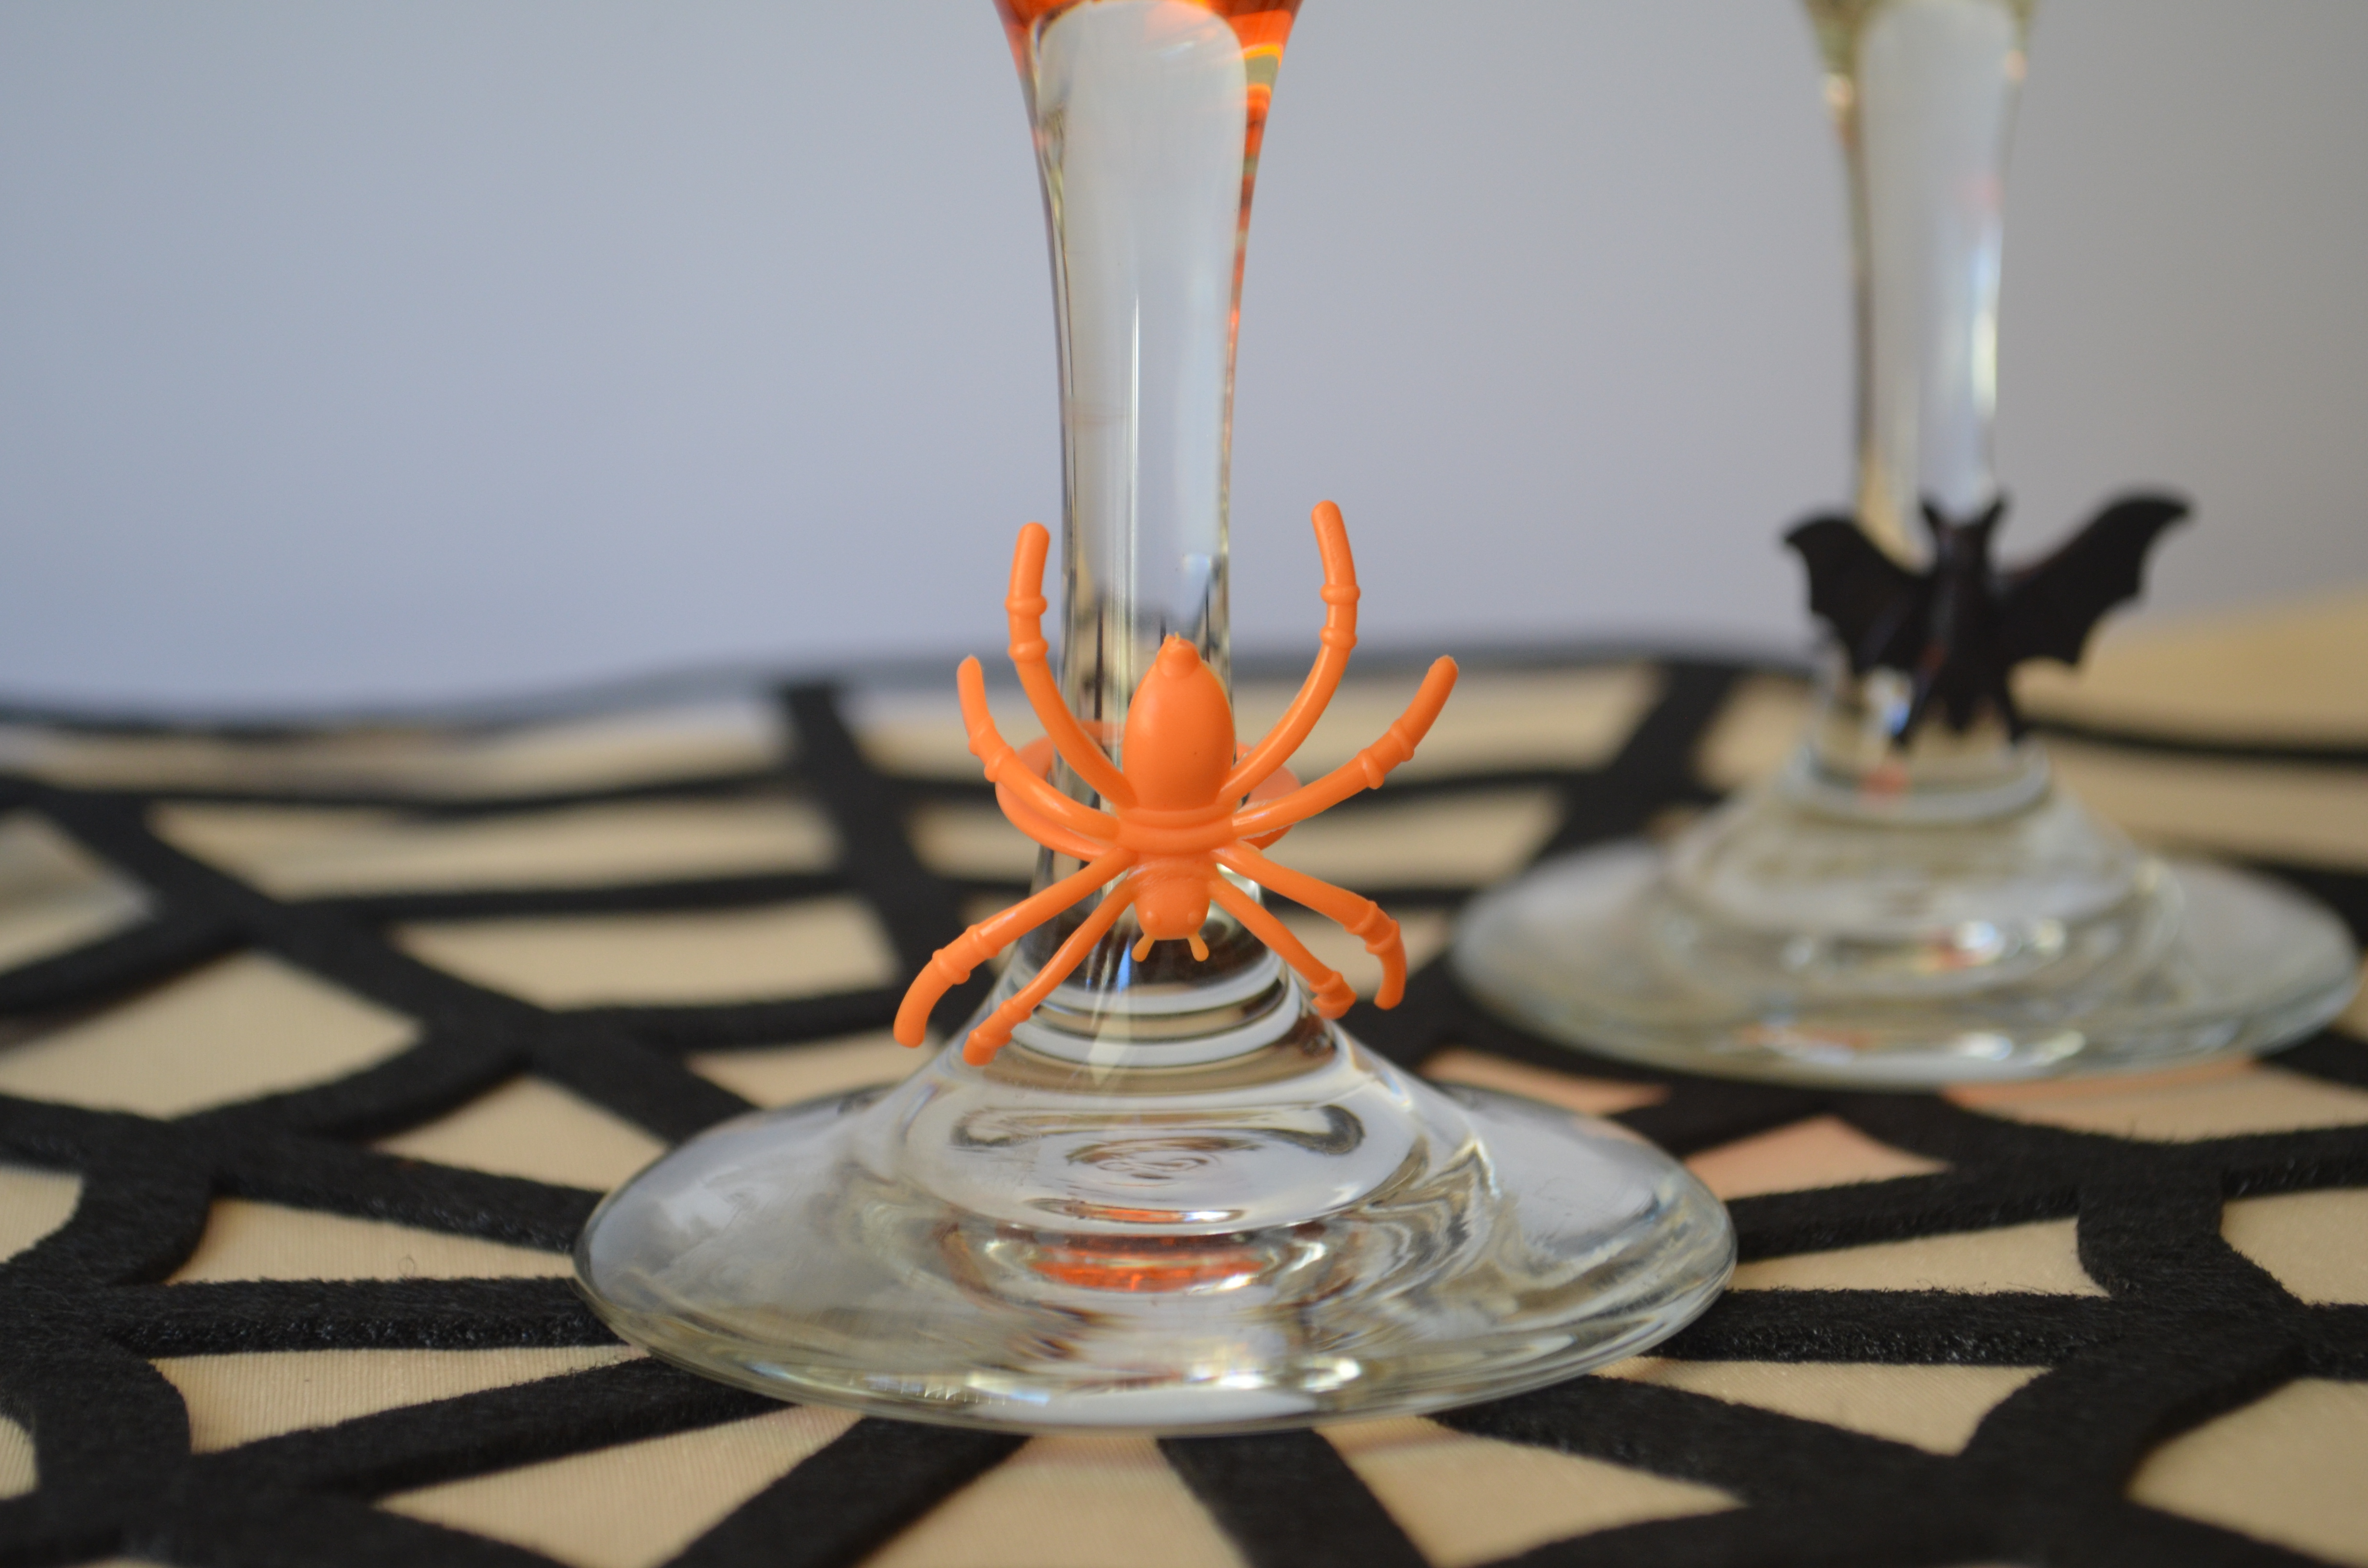
One of my favorite finds was a bag of plastic assorted spooky rings (a mix of spider, skulls and bats).  I use the rings around the stem of a wine glass to decorate it; use them to top cupcakes; glue them to a sturdy toothpick (the plastic variety) to skewer meatballs or fruit;  use them to decorate food plates (just be sure it’s obvious this isn’t edible).

ring wine charms

rings

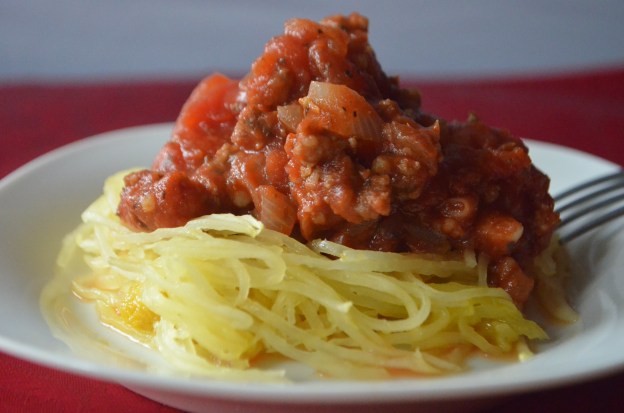
You can also dangle plastic spiders from the ceiling on dental floss; place them in cobwebs; or cut a sliver into a pumpkin or winter squash and have the spiders climbing all over the pumpkin, which is how I serve one of my recipes this week.

An idea I saw online was to freeze ice in plastic gloves and then use those to chill punch. You can also fill plastic gloves with candy or popcorn to serve.

I like to add a splash of food color to drinks. I’ve found that a few drops of food dye to Moscato doesn’t seem to affect the flavor. I’ve tried other dry wines and it does change the taste; I think this works in Moscato because the wine is sweet. Just empty a bottle of Moscato into a pitcher and add 3 drops of red dye and 6 drops of yellow and stir. You can adjust the color as needed with more dye.

orange moscato

I’ve also added food dye to margaritas and it doesn’t change the taste either. If you serve orange margaritas, rim the glass in green salt and place a spider ring on the stem of the glass.

Take your favorite hummus recipe and spread it on a plate (store-bought is fine). Then buy a jar of roasted red bell peppers and puree 1 of the pepper without liquid. Place in a piping bag and make a pumpkin face on the hummus or a scary face. You can add a celery stick to the top of its head to look like a stem.

The flavor of the roasted pepper is great with hummus. It can be a little runny, so if you want to make a bloody looking creature this will serve you well.

Hummus with roased red pepper

Halloween Party Ideas: Sundried Tomato Spider Web Pesto Dip

As far as I’m concerned, pre-Halloween planning kicks off the holiday season in our house. Truth be told, this is my Christmas season, too.

I simply relish every day between now and Dec. 26, when I slip into immediate post-holiday depression. But until then, it’s fun, fun, fun

Halloween falls on Saturday this year so celebrations are bound to be big! Spending is expected to top $6.9 billion, according to the National Retail Federation. Adult spending on costumes now outpaces spending on children’s costumes proving I’m not alone in loving this spooky day.

And I am never short of ideas when it comes to Halloween. I plan to post a new recipe or party idea every day this week for Halloween. I am stoked.

This dip isn’t just fun, it is absolutely delicious! Try it. You won’t be sorry.

Sundried Tomato Spider Web Pesto Dip

1 (8-ounce) block of cream cheese, softened

2 ounces feta cheese crumbles

½ cup jarred pesto sauce

Half an (8.5 ounce) jar julienned sundried tomatoes

1 fake spider for the center

French bread to serve

Allow cream cheese to come to room temperature on the counter for an hour or so. Then stir it with feta cheese until well combined.

Spread the mixture on a medium-sized round plate. Smooth pesto over the top.

Use a toothpick to draw a spider web into the cream cheese. Slice sundried tomato pieces as uniform as possible to make a web. Then use those slices to craft the web on the pesto.

When done, place a fake spider in the middle of the dip. Serve with French bread to spread this dip.

Five-Minute Pumpkin Mousse

If you only try one new pumpkin recipe this fall, let it be my Five-Minute Pumpkin Mousse.

Don’t let the word “mousse” intimidate you because this is as easy as it gets: it takes five minutes and has five ingredients. You simply whisk together sweetened condensed milk, canned pumpkin, pumpkin pie spice, and whipped topping. Then serve it with gingersnap cookies for dipping (although the velvety mousse is delicious on its own).

I’ve created a variety of pumpkin mousse recipes over the years, but this is my best.

I gave my 3-year-old – who is hesitant to try new things – a bite and asked if she wanted another bite. She said: “I want the whole thing,” and promptly took it from my hands. She licked the bowl clean.

My husband said he could bathe in this; my mom said it was better than pumpkin pie. The rave reviews have ensued every time I make it (and I am sure you’ll get the same response).

This recipe will be a winner this holiday season. It’s even better after a few hours of refrigeration, but can be served immediately, too.

This mousse would be great at your Halloween party. Simply carve out a small pie pumpkin and fill it with mousse and serve it with Gingersnap cookies.

Five-Minute Pumpkin Mousse

Makes 20 (2-ounce) servings

1 (14-ounce) can sweetened condensed milk

1 (15-ounce) can pumpkin puree

1 teaspoon pumpkin pie spice

1 (8-ounce) tub of whipped topping, defrosted

Mini Gingersnap cookies to garnish

Beat or stir together sweetened condensed milk, pumpkin, pumpkin pie spice and whipped topping, until combined.

Pour mixture into 2-ounce glasses and top with a gingersnap cookie. Serve immediately.

Other serving options: If you have a smaller crowd and want to serve larger portions, you can serve pumpkin mousse in wine glasses with or without a cookie. You can also crumble cookies and put them on top.

.DSC_0563 (2)

Lower Carb Amazing Red Sauce over Spaghetti Squash

The sauce is so delectable and rich, you will not miss the pasta. You will shed about 30 carbs per cup from this dish though.

If you’ve never tried it, spaghetti squash is a big yellow squash that you bake and when it’s done, you use a fork to shred the flesh and it turns into strings that resemble noodles. It’s a healthier, lower-carb option than past; a cup of spaghetti squash has less than 10 carbs compared to about 40 carbs in pasta.

My amazing red sauce was adapted from a recipe my dear friend Heather Landwer gave me a few years ago. I had my own red sauce recipe at the time, but it took about 5 hours to make and this one is just as good but takes about 1 hour and 10 minutes (most of that time is just simmering). It is an intense, thick red sauce and it pairs perfectly with spaghetti squash. I liked the combination so much, I will not use traditional pasta again with this dish.

Amazing Red Sauce over Spaghetti Squash

Serves 4

1 (16-ounce) package Jimmy Dean Sage or Hot sausage

1 large white onion

1 tablespoon sugar

1 tablespoon dried oregano

1 tablespoon dried basil

1 (12-ounce) can tomato paste (note, this is the big size)

1 tomato paste can filled with water

1 (15-ounce) can diced or stewed tomatoes

1 large garlic clove, chopped

2 bay leaves

1 large spaghetti squash

Olive oil and salt

Preheat oven to 375 degrees.

Cut spaghetti squash in half and remove the seeds and strings in the cavity. Drizzle with olive oil and sprinkle salt on the flesh. Pierce the flesh with a knife in several places. Place on a baking sheet and bake for 1 hour.

While the squash cooks, chop a large white onion. In a pot or pan with a tight lid, fry the sausage and onion together. When sausage is nearly cooked, add oregano, basil and sugar.

When it’s cooked through, drain the fat off the sausage and return the mixture to the pan. Add tomato paste, water, tomatoes, garlic, bay leaves and bring to a boil for 1 minute. Then reduce to a simmer, cover and simmer for 1 hour.

When the squash is done, remove it from the oven and use a fork to shred the inside. Continue to shred until you have removed all the flesh away from the shell. Serve topped with red sauce.

Easy Acorn Squash Stuffed with Circle B Ranch Italian Sausage and Trio of Peppers

What a week. I had planned this for dinner Monday but didn’t get a chance to make it until lunch on Friday. This easy dish comes together in 20 minutes or less (that tells you how busy my week was when I couldn’t even fit this in).

I used sweet Italian sausage from Circle B Ranch, a small hog farm in Seymour, Mo., that is certified Humanely Raised and has great products. I’ve been to the farm and the hogs are healthy and roam freely.

For this dish, I simply microwaved the squash, sautéed all my other ingredients and then stuffed them into the cooked squash. I drizzled it all with 18-year-old balsamic vinegar. An excellent quality balsamic vinegar is a must in this dish which has a lot of sweet accents from the sausage and squash and the vinegar just pulls them all together.

Serves 2

1 acorn squash

1 Italian sausage links

1 small red onion

Half a red bell pepper

Half a green bell pepper

Half a yellow bell pepper

1 small garlic clove

Excellent quality aged balsamic vinegar for drizzling

Directions:

Cut acorn squash in half and scrape out the seeds. Stab the flesh several times with a sharp knife. Season with salt and pepper and place 1 teaspoon of butter or olive oil in the cavity of each half. Place in a microwave safe dish with 1/2 cup of water on the bottom. Cover with plastic wrap and microwave on high for 12-15 minutes, or until tender.

As that cooks, chop red onion, red, yellow and green bell peppers; and garlic.

In a nonstick pan, sauté the onion and sausage (remove the casing first) together until almost done. When the sausage is about a minute away from being cooked through, add the bell peppers and onions and cook 2 minutes. Add salt and pepper to taste.

By now, the squash will be done. Carefully remove the plastic wrap and don’t put your hand in front of the steam.

Stuff filling into the cavity of each. Drizzle generously with balsamic vinegar and serve.

Acorn Squash Stuffed with Curried Chickpeas (Quick and Economical)

If you want a delicious dinner for less than $5 per person (with leftovers), make this.

This meal comes together in about 15 minutes and cost me  $5 total to make (but I had all the spices, butter and salsa on hand already so I didn’t buy those).

It serves 2 and there’s plenty of curried chickpeas leftover for lunch the next day, Simply make some rice and serve the chickpeas over that or stuff them into a baked potato.

You can also buy two acorn squashes and stuff those and this will serve 4.

The nutty chickpeas, spicy curry, and crunchy green pepper and were a beautiful contrast to the sweet, tender acorn squash flesh.

It was cheap, quick, filling, delicious and healthy. This dish is an excellent source of fiber, vitamins C, A, and B.

I hope you enjoy it

Acorn Squash Stuffed with Curried Chickpeas (Quick and Economical)

Serves 2

1 acorn squash

2 tablespoons butter, plus 2 teaspoons

1 medium red onion

1 green bell pepper

1 ¼ teaspoon curry powder

1/8 teaspoon ground cumin

¼ teaspoon ground cinnamon

1 (15-ounce) can of chickpeas, drained

½ cup salsa

Cut acorn squash in half and scrape out the seeds. Stab the flesh several times with a sharp knife. Season with salt and pepper and place 1 teaspoon of butter in the cavity of each half. Place in a microwave safe bowl with 1/2 cup of water on the bottom. Cover with plastic wrap and microwave for 12-15 minutes, or until tender.

While that microwaves, chop onion and bell pepper and set aside.

In a large skillet, heat 2 tablespoons oil. When hot, add onion and cook 3 minutes. Then add green bell pepper and chickpeas and cook 4 minutes. Add salsa and heat through.

When squash is done, remove it carefully and peel back the plastic wrap carefully being sure not to put your hand in front of the steam.

Stuff each squash with curried chickpea mixture and serve.

Rotisserie Chicken and Bacon Pizza with Sundried Tomatoes and Feta

Friday nights call for pizza.

After a long week, a quick, satisfying pizza with a glass of wine is the perfect end to the week. And this pizza is fantastic. I use Naan, which is my favorite pizza dough, and then top it with tomato sauce, chicken, sundried tomatoes, cheese, bacon, and feta.

After it bakes, I sprinkle basil on top.

It’s quick, convenient and delicious. What more could you ask for as you end the work week? I hope you enjoy it.

Chicken, Bacon 2

Chicken, Bacon Pizza with Sundried Tomatoes

Serves 4 as appetizer; 2 as main course

The sundried tomatoes and fresh basil really lift the flavor of this pizza; and of course, the bacon adds a lot, too. This pizza is easy, great for a quick dinner or a party.

1 ready-made Naan crust or pizza dough (Stonefire is my favorite brand)

Pizza sauce, desired amount

1 cup chopped, skinless rotisserie chicken

1/3 cup real bacon pieces (store bought is what I used)

1/4 cup chopped sundried tomatoes

1 1/3 cups shredded mozzarella cheese (or desired amount)

1/4 cup feta cheese

Fresh basil to garnish

Preheat oven to 400 degrees.

Spread pizza sauce over dough. Top with chicken, bacon, sundried tomatoes and cheeses.

Bake for 15 to 18 minutes. Remove and garnish with slices of fresh basil. Allow to rest for 5 minutes before slicing.

Rotisserie Chicken Salad with Figs, Grapes and Moscato Dressing: “Ode to Wine Country”

Ode to Wine Country

Serves 2

I call this “Ode to Wine Country” because it’s a beautiful salad of arugula and spinach, figs poached in Moscato, globe grapes, walnuts, chicken and a Moscato dressing with a hint of rosemary.  These are the some of the flavors found in wine country.

This salad comes together in about 10 minutes but tastes like a salad you’d get in an upscale restaurant. It is healthy and practically effortless.

My husband and I have both been losing weight recently- he’s down 20 pounds and I’ve shed 10- so we’re eating a lot of salads!,

Salad can get boring after awhile, but this one will keep us coming back for more.

Tip: If you don’t regularly drink Moscato, buy one of the airplane-size bottles for the recipe.

2/3 cup inexpensive Moscato (you’re using it to poach, so it doesn’t need to be an expensive bottle)

6 dried figs

4 cups mixed arugula and spinach mix (you can also substitute a spring mix of greens)

12 globe grapes

12 walnut halves

1 1/2 tablespoons minced red onion

2/3 cup chopped rotisserie chicken

2 teaspoon extra virgin olive oil

2 teaspoon balsamic vinegar

6 teaspoons Moscato liquid reserved from poaching

1/4 teaspoon dried rosemary, crumbled

¼ teaspoon honey

Goat cheese crumbles (optional)

Place Moscato in a small pot and turn the heat on to medium. While it heats, slice figs in half and set aside.

Next, divide the greens between two plates.  Rinse the grapes off and slice in half.  Divide the grapes and walnuts evenly between the plates. Next, chop the onion and chicken and divide that between the plates.

By now, your Moscato should be bubbling. Add the figs and poach for 3 minutes. Remove figs immediately, but reserve the Moscato liquid.

In a bowl, whisk together the olive oil, balsamic vinegar, 6 tablespoons of the Moscato liquid, rosemary and honey. Pour over salad and toss thoroughly. If desired, add goat cheese.

Add salt and pepper to taste and serve.

Slow Cooker Apple Butter

I met a family once who planned their annual reunion around apple butter.

I spent the weekend with this clan – about 40 strong- who peeled hundreds of apples on Friday, and then Saturday slowly cooked the apples down over a huge, antique copper pot. They took turns stirring the apples with a wooden spoon that looked like a paddle.

It was a crisp fall day and I sat at watched steam rise from the pot and the aroma of a campfire, apples, cinnamon and cloves fill the air (I was writing a story about their unique tradition).  When the apples had melted into a thick butter-like consistency, they canned the mixture into the night. When that was done, they made a mega batch of biscuits and used the warm biscuits to scrape up the last of the apple butter that still glazed the inside of the pot.

I can’t eat an apple butter stuffed biscuit without thinking of them. I had to stop this photo shoot to gobble up a biscuit.

apple butter biscuit

I love apple season and autumn means the apples are ripe from the orchards to the farmers markets and the grocery stores.  Now, as much as I enjoy apple butter, I don’t have time to make it from scratch so I whip up a slow cooker version.

You have to peel about 10-12 apples, but if you have an apple peeler, then it’s quick.  I use a mix of Granny Smith and red apples for this.

You can make a variation on this recipe by adding ½ teaspoon or ¼ teaspoon of extract once the mixture has been cooked. For example, split the batch in half or thirds and add vanilla extract, or maple or rum (those are my favorites). It’s just a slight twist on the same recipe. I always start with ¼ teaspoon and then double it if I don’t think it’s changed the flavor enough.

apple butter close

Slow Cooker Apple Butter

Makes about 1 1/2 pints

7 cups of peeled and sliced Granny Smith apples

1 ½ cups peeled and sliced red apples (about 2 red apples)

¾ cup brown sugar

¾ cup sugar

1 teaspoon ground cinnamon

1/2 teaspoon ground nutmeg

1/8 teaspoon ground cloves (use less or omit if you don’t like cloves because you can taste it)

1/3 cup apple juice

Place apple juice in the bottom of a slow cooker.

Core, peel and slice all the apples and place on top of apple juice. Stir together your sugar and spices until well combined and sprinkle over the apples. Cover and cook for 10 hours, undisturbed. When done, allow to rest at the warm temperature setting for 1-2 hours. Then turn off and remove the lid and let the mixture stand for 30 minutes to cool.

Place in a food processor and blend until smooth (don’t use all the liquid in the slow cooker or it may be too thin). Place in an airtight container and refrigerate for up to 10 days.

Preserving and using your herbs – and a great pesto recipe

The end of summer means the end of an herb garden is near.

Depending on the weather, you may have several weeks to harvest fresh herbs, but I like to start cutting my plants back now and preserving as many as possible for winter.

If you have a sunny spot in the house, you can bring in oregano, rosemary, and lavender which will usually survive for several months inside. I’ve had mixed luck with basil but it’s worth a try.

Some herbs like rosemary and thyme are easy to dry, while others like cilantro and basil, do not dry well. This week, I have a lot of suggestions on which herbs to dry, freeze or use now (and a great pesto recipe to use up that basil).

First, let’s talk about basil, which is the most commonly grown herb. There’s nothing like fresh basil, but that flavor is hard to capture.  The best way to preserve basil is to make pesto and freeze it.

I recommend buying mini plastic storage containers to freeze basil in smaller portions (about ½ to 1 cup at a time). My husband is a teacher and one of his co-workers, Janice Queen, makes amazing pesto. I asked her to share her recipe. Something I really like about this recipe is it calls for almonds, as well as pine nuts (pine nuts are very expensive, so this is a more economical recipe).  The recipe also calls for a good dose of parsley, which is nice if you’re growing that, too.

Pesto is versatile: use it as a salad dressing, toss it with pasta and fresh tomatoes, or pour it over a block of cream cheese for a quick dip (serve with crackers and French bread).

Herb butters are another wonderful way to use up herbs, particularly rosemary and basil.  All you have to do is soften 1 stick of unsalted butter, stir in 2 tablespoons of chopped basil or 1 tablespoon chopped rosemary. Then spread it on a slice of French bread.  It’s marvelous and an easy and inexpensive addition to a party. You can also add 1 tablespoon finely minced sundried tomatoes to the butter.

If I am serving it at a party, I serve it at room temperature, but if you want herb butter for your family, mold the butter back into a log, place it in plastic wrap and store it in the refrigerator for several days (rosemary butter will last longer than basil).

If you have leftover herb butter, use it in pasta, on vegetables, or spread a pat on a steak.

Another idea to use either fresh or dried herbs is to sprinkle herbs (thyme, oregano, rosemary or a combination are my favorites) on a mix of balsamic vinegar and extra virgin olive oil for a quick bread dip. You can use that recipe to marinate vegetables that you’re going to grill, too. Be sure to add salt to both dishes though.

Ok, now we’ve used fresh herbs, let’s talk about drying herbs.

Before you dry any herb, you want to rinse it gently and pat it dry with a paper towel. Only dry herbs that are in perfect condition, and discard any that are wilted or changing colors.

Certain herbs, like thyme and rosemary, dry beautifully. To dry these herbs all you have to do is cut off the stems, lay them on a piece of parchment paper on a pan and let it rest for about 7 days. After that, pull the leaves off and place in a spice jar away from sunlight or heat.

dried rosemary

I dry my rosemary and buy pretty glass jars and give it away at Christmas. Also, you can use dried rosemary to make an herb butter which is excellent on rolls or whipped into mashed potatoes and makes a good hostess gift.

Mint and oregano have a slightly higher moisture content and are better dried after you pick the leaves off the plant. Don’t let the leaves touch each other as this may increase the chance of the herbs molding before they have a chance to dry. Place the leaves on a paper towel on a baking sheet and cover with another paper towel.  Place them in an oven for 24-48 hours (turn on the light in the oven, not the heat). Leaves are ready when they crumble in your hand.

My favorite thing to do with cilantro is let it go to seed and then collect those seeds which are coriander seeds (and those are expensive in the store). Coriander seeds have great flavor. Another option though is to chop cilantro, place nearly 1 tablespoon in an ice cube tray and fill it with water. Freeze. This retains some of the original cilantro flavor, but will still not be the same.

Hopefully this will help you enjoy the last weeks of your herb garden and stretch that flavor into winter.

Easy Pesto

3/4 cup extra virgin olive oil

2 large garlic cloves, peeled

1/2 cup pine nuts, walnuts, almonds or a combination (I usually use almonds)

3/4 cup grated Parmesan cheese

3 cups fresh basil, no stems

3/4 cup fresh chopped parsley

Salt to taste

In a food processor, combine the oil, garlic, almonds and Parmesan cheese. Then, feed in the herbs and blend until combined.   It is so easy and freezes very well.

Recipe was originally adapted from Mollie Katzen’s Moosewood Cookbook.